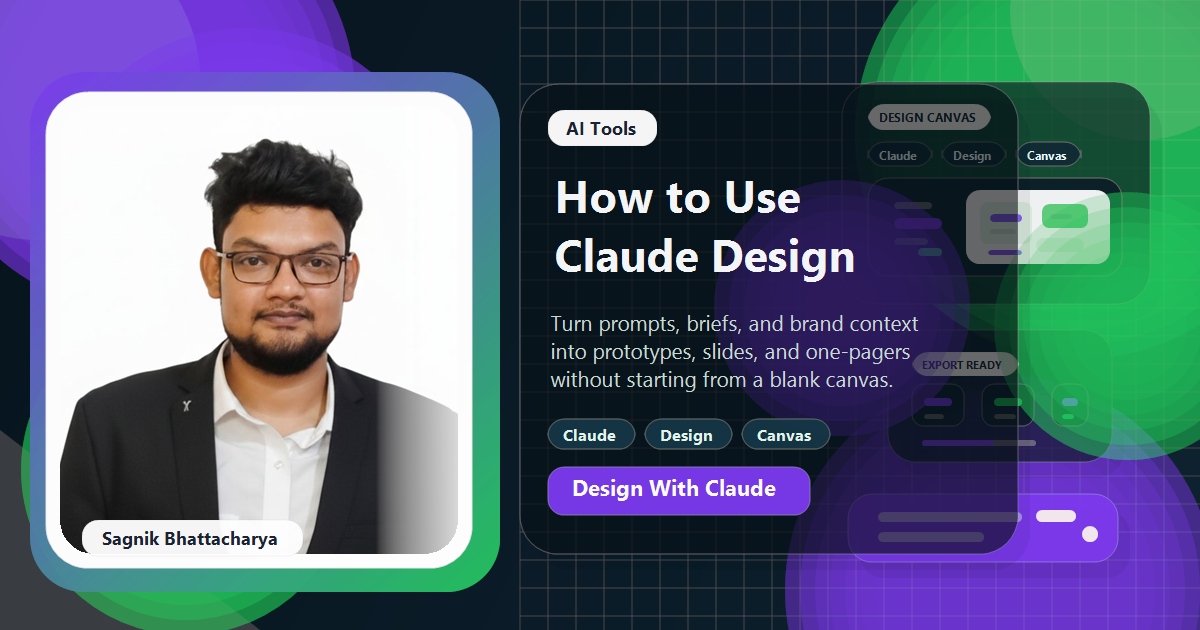
Claude Design is the newest product from Anthropic Labs, released in research preview on 17 April 2026. It lives at claude.ai/design and is powered by Claude Opus 4.7. In one sentence, it lets you collaborate with Claude to create polished visual work — designs, prototypes, slides, one-pagers, pitch decks, marketing collateral, and interactive UI mockups — without needing Figma skills or a design background.
This tutorial is written for someone who has never touched Claude Design before. By the end of it you will have made your first project, learned the two-pane canvas interface, iterated on a design using the three editing modes, uploaded reference materials, set up a team design system, shared the result with colleagues, exported it to a usable format, and handed it off to Claude Code in VS Code to turn it into real shippable code. If Claude Design is not yet available in your account, this guide also covers why (and what to check) in the troubleshooting section at the end.
Prerequisites
Before you open claude.ai/design, make sure the following are in place:
- A paid Claude plan. Claude Design is included with Pro (from $20/month), Max ($100 or $200/month), Team, and Enterprise. Free accounts cannot access it. You do not pay extra for Claude Design — usage draws from the limits of whichever plan you are already on.
- A modern browser. The canvas is a WebGL-assisted two-pane interface. Chrome, Edge, and Arc render it best. Safari works but occasionally lags on larger canvases. Firefox currently has known rendering quirks during research preview.
- Optional reference materials. You will get much better first drafts if you have one or more of: a rough sketch or screenshot of what you want, a PDF or DOCX brief, a PPTX deck to reskin, a logo PNG, or a public URL of a page whose style you want to borrow. Claude Design accepts all of these as inputs.
- Optional for teams: a link to your codebase (GitHub repo URL) or your existing design files (Figma export). Claude Design can read these during onboarding to build a design system your organisation will reuse automatically across every project.
Step 1: Open claude.ai/design and sign in
Open your browser and go to claude.ai/design. If you are already signed in to Claude on the same browser, you will land directly on the Claude Design home screen. If not, sign in with the same Anthropic account you use for regular Claude chat — there is no separate Claude Design login.
The home screen shows two things: a large "New project" button in the centre, and a list of recent projects on the left sidebar (empty on first visit). Above the sidebar, your active Claude plan is shown — if you see "Free" here, Claude Design will refuse to create a project; upgrade to Pro or Max from Settings → Billing before continuing.
During research preview, Anthropic is rolling out access gradually. If claude.ai/design redirects you back to the regular Claude chat with a "Claude Design is not yet available on your account" banner, your account is on the waitlist — the fastest way off it today is to be on a Team or Enterprise plan, or to contact Anthropic support from the same email linked to your subscription.
Step 2: Create your first project with a plain-English prompt
Click "New project". A single prompt field appears. This is where you describe, in ordinary English, what you want Claude Design to make. The quality of your first draft is almost entirely determined by the quality of this prompt, so it is worth spending thirty seconds on it rather than typing one vague line.
A weak prompt and a strong prompt produce very different first drafts. Compare these two, which I tested side-by-side:
Weak prompt:
"Make a pitch deck for my startup."

Strong prompt:
"Create a 10-slide Series A pitch deck for Coding Liquids, an
education company teaching Flutter and Excel with AI to 30,000+
Udemy students across 175 countries. Audience: early-stage B2B
SaaS investors. Tone: confident, warm, not flashy. Slides in this
order: title, problem, solution, traction (show the 30k student
number big), product demo, market size, business model,
competitors, team, ask. Brand colours: warm earth tones (#3E2723
dark brown, #E8852E orange, #FDF8F0 cream). Use Plus Jakarta
Sans for body text and DM Serif Display for slide titles."
The strong prompt gives Claude four things the weak prompt does not: a specific deliverable (10 slides, ordered), an audience (Series A B2B SaaS investors), a tone, and brand constraints (colours and fonts). You will get a usable first draft from the strong prompt in under a minute. You will get a generic template from the weak one that you then have to throw away.
Paste your prompt and press Enter. The interface immediately splits into two panes: chat on the left and canvas on the right. This is the working view you will spend the rest of the tutorial in.
Step 3: Understand the two-pane canvas interface
Every Claude Design project uses the same layout. Learning the three zones of it is the single biggest productivity win in this tool, because once you know where to click, you stop switching back to the chat for every small edit.
- Chat pane (left). This is where you give Claude high-level instructions — "add a slide about our referral programme between traction and market size", "make the colour palette darker", "rewrite the solution slide to lead with the outcome, not the product". Claude responds in the chat and simultaneously updates the canvas on the right.
- Canvas pane (right). The live rendered output. You can zoom in and out, scroll between slides or screens, and click on any element to select it. Click-and-drag selections let you pick multiple elements at once.
- Inline edit toolbar (appears on selection). When you click an element on the canvas, a small floating toolbar appears with three actions: Comment (leave a note Claude will respond to), Edit text directly (type over the selection — no AI call), and Adjust (custom sliders for that element's specific properties). This is the pane most first-time users miss, and it is where the speed comes from.
The rule of thumb: use the chat pane for anything conceptual or multi-element ("restructure the deck"). Use the canvas toolbar for anything that touches one specific element ("make this headline two sizes bigger"). Mixing these up wastes time — asking the chat to nudge one button by 4 pixels is slower than dragging the slider.
Step 4: Iterate using the three editing modes
Once you have a first draft on the canvas, real work starts. Claude Design gives you three distinct ways to edit, and the trick is knowing which to use in which situation.
Mode 1 — Chat for conceptual changes
Use the chat pane when the change spans multiple elements or reshapes the design. Examples of good chat prompts once a draft is live:
- "Make the whole deck darker and more premium — swap the cream background for deep navy and increase the contrast of the body text."
- "Move the traction slide earlier, right after the problem. The 30k student number is our strongest hook."
- "Rewrite every headline in the active voice and cut each one to under seven words."
- "Add a subtle top-right watermark with our logo to every slide."
Each of these produces a full-canvas regenerate. Claude updates in place — your existing work is preserved unless you explicitly ask for a redo.
Mode 2 — Inline comments for precise feedback on one element
Click an element, click the Comment icon, and type feedback like "this chart is too busy — show only the top three segments and group the rest as Other". Claude reads the comment, understands which element it applies to (because you selected it), and applies the change without you having to describe the element in prose. This is dramatically faster than typing "in the market size slide, the pie chart on the right has too many slices" into the chat.
Mode 3 — Direct edits and sliders for micro-adjustments
Two edit types do not need Claude at all and are instant:
- Direct text edit. Click a text element, then click the text again to enter an editable text box. Type your replacement. No AI call, no regenerate, no wait. Use this to fix typos, swap in your own copy, or try a wording variant without burning a turn.
- Adjustment sliders. Click an element and then the Adjust icon. Claude generates a small set of element-specific sliders — for a card component you might get padding, corner radius, shadow depth, background tint; for a chart you might get bar spacing, label rotation, colour saturation. Drag the slider and the element updates live. Once you are happy, ask Claude in chat to "apply these adjustments across the whole deck" and it will propagate your tweak to every equivalent element in the project.
The propagate-across step is the secret. It is what turns a single tweak into a design-system-level change — and it is why the tool makes sense for people with no design background.
Step 5: Upload reference materials for better drafts
Text prompts are a starting point. The fastest upgrade you can make as a beginner is learning to upload references alongside your prompt, because it lets Claude borrow specifics it otherwise has to invent.
Every project has an Attach button next to the chat input. The file types Claude Design accepts as of research preview are:
- Images (PNG, JPG). Paste a screenshot, a hand sketch, a moodboard, or a photo of a whiteboard. Claude will match the layout or style. A common use: screenshot a competitor's landing page and ask "match this structure but for our product".
- Documents (DOCX, PPTX, XLSX). Upload a brief in Word, a rough deck in PowerPoint, or a data table in Excel. Claude will read the content and produce a polished visual version. The XLSX path is particularly strong for data-driven slides — upload your quarterly numbers and ask for a "board-ready chart slide" and the data stays accurate.
- Codebase references. Paste a GitHub URL or upload a zip. Claude reads your components, extracts your existing colours, spacing, typography, and component patterns, and uses them in the design. This is the shortcut to "on-brand" without building a design system manually.
- Web capture. Click the capture tool in the Attach menu, paste a public URL, and Claude grabs the page's visual tokens — colours, typography, spacing rhythm — then applies them to your design. Useful for matching a corporate brand without any brand files.
You can attach multiple references to a single prompt. A practical combination: a DOCX brief, a PNG logo, and the URL of your live marketing site. Claude will align tone with the brief, place the logo correctly, and match the style of the site — all in one draft.
Step 6: Set up a design system (optional but high-leverage)
If you are going to use Claude Design more than once, spend ten minutes on this step the first time and save yourself an hour on every future project.
From the home screen, click Organisation → Design system. You will be asked to point Claude at one of:
- Your live codebase (GitHub URL or zip upload)
- Your existing Figma file (export as a
.figor linked library) - A manual set of tokens (colours, fonts, spacing, component screenshots)
Claude reads whatever you provide and extracts a design system: the palette, the type scale, the spacing grid, the component shapes, the visual language. From that point on, every new project your organisation creates uses these automatically — you do not need to re-paste your brand colours into each prompt. The output is also noticeably more consistent across projects because it is not inventing a new visual language every time.
One caveat during research preview: the design system extraction is best on codebases that already use a design-token library (Tailwind config, CSS variables, or a component library like shadcn). If your code is ad-hoc CSS with hand-picked hex codes scattered across files, Claude will still try, but the extracted palette may need a round of manual review before you trust it for team-wide use.
Step 7: Collaborate — organisation-scoped sharing
Every project has a Share button in the top-right of the canvas. Clicking it gives you three choices:
- Private (default). Only you can see the project. Use this while the design is rough.
- Anyone in your organisation with the link can view. Read-only for colleagues on the same Claude Team or Enterprise workspace. They can see the canvas but cannot edit or chat with Claude about it.
- Anyone in your organisation with the link can edit. Full collaborative mode. Multiple teammates can open the same project, see each other's cursors on the canvas, edit different elements in parallel, and participate in the same chat with Claude — so Claude responds to whoever asks, with everyone watching.
Two things to know about the sharing model. First, "organisation-scoped" means exactly that — the link will not work for someone outside your Claude Team or Enterprise workspace. There is no public share link during research preview. If you need to show a design to an external client or investor, export to PDF or standalone HTML (Step 8 below). Second, the shared-edit mode does not have granular permissions yet — anyone with edit access can change anything, so use it with people you trust to iterate in good faith, not as a public review tool.
Step 8: Export to Canva, PDF, PPTX, or standalone HTML
Once a design is ready to leave Claude Design, click Export in the top-right. The four export formats cover almost every downstream use case.
- Canva. Opens the design directly in Canva as an editable file, preserving layers and text. Use this when a marketing teammate needs to tweak copy or swap stock imagery and they live in Canva. Requires a one-time OAuth sign-in the first time you export — Canva Free accounts work.
- PDF. A flat PDF at the canvas resolution. Best for investor decks, one-pagers sent over email, and anything that must render identically on any device. The PDF preserves hyperlinks in interactive prototypes.
- PPTX. A PowerPoint file with each slide as a real, editable slide (not a single image). Use this when the eventual reviewer lives in PowerPoint — fonts fall back to system defaults if you used a custom typeface, so embed your font or convert text to outlines if precise typography matters.
- Standalone HTML. A single self-contained
.htmlfile with the full interactive prototype, no build step required. Double-click it and it runs in any browser. Ideal for sending an interactive prototype to an external reviewer without asking them to install anything. For code-powered prototypes that use voice, video, shaders, or 3D, the standalone HTML export bundles all of that in.
There is also a "Save as folder" option that exports every asset — images, fonts, source JSON — into a zip. Use this only if you plan to rebuild the design in another tool by hand.
Step 9: Hand off to Claude Code to ship real code
This is the feature that sets Claude Design apart from Figma or Canva. When a design is ready to be implemented as real, shipping code, you do not hand off a spec and hope your developer interprets it correctly. You hand off a bundle that Claude Code consumes directly.
From the top-right menu, click Hand off to Claude Code. Claude Design packages everything Claude Code needs to implement the design faithfully: the component tree, the applied design system tokens, any embedded assets, and a structured spec. You get a single command you can paste into your terminal inside your project, for example:
claude "Implement the handoff bundle at ~/Downloads/claude-design-pitch-deck.zip in src/pages/pitch/. Match the existing Next.js App Router conventions and the design tokens already in src/styles/tokens.ts."Claude Code unpacks the bundle, reads your project, matches your framework (React, Next.js, SwiftUI, Flutter, Vue), places components under your existing file layout, maps design tokens to whatever variable system you already use, and opens a diff for you to review. For anyone who has ever copy-pasted a Figma spec into a developer's Jira ticket and watched the shipped version drift 20% away from the design, this workflow is a meaningful upgrade.
If you are new to Claude Code itself, I have written a full setup guide at Claude Code in VS Code: Extension Setup and Hybrid Workflow with Copilot. Complete that first, then come back to this step — handoff works best when Claude Code is already authenticated and configured against the target repo.
Five prompt patterns that work well on Claude Design
Prompts are the steering wheel of this tool. Five patterns consistently produce usable first drafts based on my testing since launch.
- The investor one-pager. "Create a one-page investor summary for <company>, a <one-sentence description>. Include: hero headline (10 words max), problem (2 sentences), solution (2 sentences), traction (three highlighted numbers — <list them>), team (three names with 10-word bios), and a single call-to-action with our contact email. Brand: <colours and fonts>."
- The landing page wireframe. "Design a landing page wireframe for <product>. Sections, in order: nav, hero with product shot on the right, three-feature row, social proof band, longer product explanation with side-by-side visual, pricing (three tiers — <list>), FAQ, footer. Use our existing brand system. Desktop-first, mobile second."
- The board deck slide. "Build one slide titled <title> that shows <the specific message>. Data: <paste CSV or attach XLSX>. Visualise as <bar/line/stacked>. Highlight the delta between <X> and <Y>. One-line takeaway at the bottom in our brand orange."
- The app screen mockup. "Mock up the <onboarding/settings/checkout> screen of a <type of app>. Include: <list of UI elements>. Match iOS/Android/web conventions. Use our design system. Include hover/pressed/disabled states for every interactive element."
- The marketing collateral variant. "Take the attached one-pager and generate three variants: (1) a 1080x1080 LinkedIn post, (2) a 1080x1920 Instagram story, (3) a 1200x630 OG image for the blog. Keep the headline and CTA the same, adapt the layout to each aspect ratio."
The common thread across all five is specificity. Size, order, constraints, and a concrete deliverable. Vague prompts produce vague drafts — always.
Claude Design vs Figma vs Canva
This is the comparison most people will ask about. Here is an honest, side-by-side assessment.
| Feature | Claude Design | Figma | Canva |
|---|---|---|---|
| First-draft speed from prompt | Seconds | Manual | Template + edits |
| Design background required | No | Yes (high) | No |
| Team design system | Auto-extracted from codebase | Libraries (manual build) | Brand Kit (paid) |
| Developer handoff | Direct to Claude Code | Dev Mode + spec | Not a target |
| Pixel-precise UI work | Limited (research preview) | Industry standard | Limited |
| Stock imagery + templates | None built-in | Community files | Massive library |
| Interactive prototypes | Yes (HTML export runnable) | Yes (click-through) | Limited |
| Price | Included with Claude Pro/Max/Team/Enterprise | Free tier + $15/editor/month | Free tier + $13/user/month |
| Best for | First drafts, prototypes, code handoff | Pixel-precise UI, design systems at scale | Marketing collateral, social posts |
The honest read as of April 2026 is that Claude Design is not replacing Figma or Canva. It is compressing the "blank page to first draft" step from hours to minutes, and in doing so it changes which tool you reach for at which moment. For most teams the pattern will be: start the first draft in Claude Design, refine in Figma (if pixel-precise) or Canva (if marketing collateral), ship via Claude Code. I expect that workflow to hold until at least one of these tools ships something that closes the gap — and Canva's AI features are the most likely to do so first.
Troubleshooting the first-session gotchas
Most first-session pain resolves to one of five issues. Check them in this order before searching further.
- "Claude Design is not yet available on your account." Three possible causes. (a) You are on the Free plan — upgrade to Pro from
Settings → Billing. (b) You are on Pro/Max but the research-preview rollout has not reached your account yet — Team and Enterprise plans get access first. (c) You signed in with a different email than the one on your subscription. Sign out, sign back in with the email that carries the paid plan, and refresh claude.ai/design. - Canvas is blank or stuck on "Preparing workspace…" The canvas uses WebGL-assisted rendering. On Chrome and Edge, open
chrome://gpuand confirm that WebGL2 and Canvas are both marked "Hardware accelerated". If they are software-only, enable hardware acceleration in browser settings and restart. Browser extensions that block WebGL — some privacy extensions do — are the second most common cause; try an incognito window to isolate. - Export to Canva fails with "authorisation expired". The Canva OAuth token expires after inactivity. In Claude Design, open
Settings → Integrations → Canva, click "Reconnect", and sign back in. On the very first connect, make sure pop-ups are allowed forclaude.ai— the OAuth flow opens a pop-up, and if it is blocked the connect silently fails. - Design system extraction hangs on codebase import. Two causes. (a) The zip is too large — the current research-preview limit is 500 MB, and large repos with
node_modulesordist/folders overshoot it fast. Strip build artefacts and upload again. (b) The repo is private on GitHub and the URL-import path cannot reach it — export the repo as a zip and upload that instead, or wait for the private-GitHub integration that Anthropic has on the roadmap. - "Anyone with the link" share still prompts colleagues to sign in. This is working as intended. Organisation-scoped sharing means the viewer must be a member of the same Claude Team or Enterprise workspace — even with "view" permission, they must sign in so Claude knows which organisation they belong to. If you need to send a design to someone outside your workspace, export to PDF or standalone HTML (Step 8) instead.
Limitations and honest assessment
Claude Design is four days old at the time of writing. It is worth knowing what it is not good at yet.
Not pixel-precise
For production UI work that ships to millions of users — a consumer-grade mobile app, a public website where kerning matters — you will still finish in Figma. Claude Design gets you to a 90% draft in minutes that a designer can refine in Figma to 100% in hours. The 10% gap matters when the work is customer-facing at scale. It does not matter much for internal tools, prototypes, pitch decks, or marketing one-pagers.
Research preview rollout is uneven
Access is being rolled out gradually. If you are on Pro but have not received access, you may wait days or weeks. Team and Enterprise plans get faster access. This is a temporary situation and the tool is fully included in those plans — once the rollout completes, Pro users will have it automatically.
No offline mode
Everything runs in the browser and everything calls Claude. You cannot edit a design on a flight or in a coffee shop with bad Wi-Fi. The canvas is not local.
Limited stock library
Unlike Canva, there is no built-in million-image stock library. You either upload your own imagery, pull from a web capture, or let Claude generate simple illustrative graphics. For hero images, product photography, or anything requiring a real photograph, you still need a stock source.
Frequently Asked Questions
Is Claude Design free to use?
No. Claude Design is included with paid Claude plans only — Pro (from $20/month), Max ($100 or $200/month), Team, and Enterprise. There is no free tier and no standalone Claude Design subscription. Usage draws from the limits of whichever plan you are already on, with optional extra usage available on some tiers. If you already pay for Claude Pro or Max, Claude Design is unlocked at claude.ai/design at no extra cost. Free Claude accounts cannot access the tool.
What is the difference between Claude Design and Claude Artifacts?
Artifacts are single rendered outputs that appear inside a normal Claude chat — for example, a React component or an HTML page Claude produces alongside a conversation. Claude Design is a dedicated product with its own two-pane canvas interface, a project concept that persists over time, inline editing tools (comments, direct text edits, sliders), a team design system, organisation-scoped sharing, and native exports to Canva, PDF, PPTX, and standalone HTML. Artifacts are good for one-off snippets. Claude Design is built for iterating on and shipping real visual deliverables.
Can I use Claude Design without any design background?
Yes — that is the primary audience. Anthropic explicitly positions Claude Design for founders, product managers, marketers, and account executives who need polished visual output without Figma or Adobe skills. You describe what you want in plain English, review the result on the canvas, and ask for changes in the chat. The one skill that helps is writing a clear prompt: be specific about audience, tone, the key message, and any constraints (brand colours, a logo, a target length). Vague prompts produce generic output; specific prompts produce usable output on the first draft — see the prompt patterns section above.
What does "handoff to Claude Code" actually do?
When a design is ready to ship as real code, Claude Design packages the design — including the component tree, the applied design system tokens, any assets, and the spec — into a handoff bundle that you pass to Claude Code with a single instruction. Claude Code then implements the design in your actual repository, matching your framework (React, Next.js, SwiftUI, Flutter, etc.), your file layout, and your existing conventions. This is the fastest way to get from "I sketched a prototype with Claude Design" to "the component is merged in the codebase" without manually redrawing the design in Figma and then reimplementing it from a spec.
Can Claude Design replace Figma or Canva for my team?
Not fully, and it is not trying to. Figma remains the industry standard for high-fidelity UI design with pixel-precise components, design system libraries, and hand-off to engineering. Canva remains the go-to for print collateral, social templates, and brand assets with a massive stock library. Claude Design sits between them — it generates a first draft in seconds from a prompt, exports cleanly to Canva for further polish, and hands off directly to Claude Code for implementation. For most teams in 2026, the pattern is: start the first draft in Claude Design, refine polish in Figma or Canva depending on the asset, ship code through Claude Code. The three tools complement each other rather than replace each other.
Related Tutorials
- Claude Code in VS Code: Extension Setup and Hybrid Workflow with Copilot (2026) — the natural next step after Claude Design; this is where the handoff bundle lands and becomes real, shipping code.
- How to Use Claude Code in Android Studio: AI-Powered Coding for Kotlin, Flutter, and Gradle Projects — if your handoff target is a mobile app rather than a web project.
- ChatGPT vs Claude vs Copilot vs Gemini for Excel in 2026 — where Claude fits among the other big AI assistants for non-design work.
- How to Use Gemma 4 in VS Code: Setup, Extensions, and Coding Workflows — the free, local alternative to Claude Code if cost is a blocker after you generate your design.
Sources
- Introducing Claude Design by Anthropic Labs — official launch post
- Get started with Claude Design — Claude Help Centre
- Set up your design system in Claude Design — Claude Help Centre
- Claude Design admin guide for Team and Enterprise — Claude Help Centre
- Using Claude Design for prototypes and UX — Anthropic