Cursor has become one of the most talked-about code editors in the AI era, moving from niche curiosity to mainstream tool in under two years. Because user counts, funding, and valuation figures change quickly, this guide focuses on the workflow rather than repeating a stale market-size claim. The pitch is simple: take VS Code, fork it, and integrate AI deeply into coding workflows. For web developers working in TypeScript and React, the experience is already well-documented across dozens of guides and YouTube tutorials.

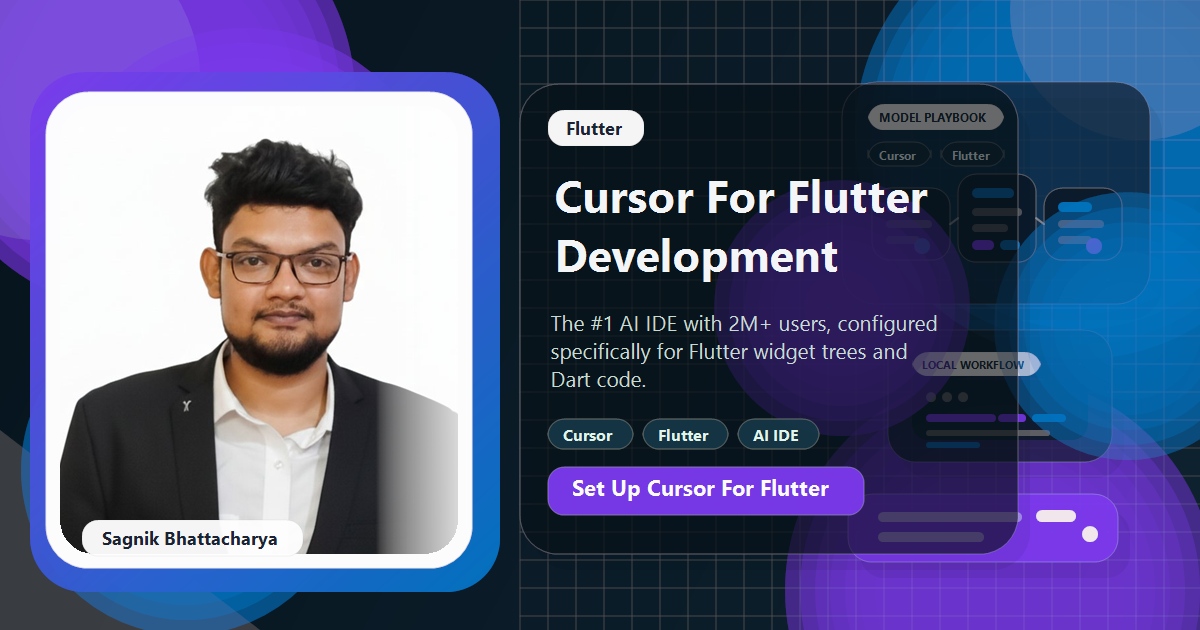
The Complete Flutter Guide: Build Android, iOS and Web apps
Go from scratch to building industry-standard apps with Riverpod, Firebase, animations, REST APIs, and more.
Enrol nowFlutter developers, however, have been largely left out of that conversation. Search for "Cursor Flutter" and you will find a handful of Reddit threads and scattered forum posts, but almost no dedicated, structured guide covering how to set Cursor up specifically for Dart and Flutter projects. That is what this guide addresses. I have been using Cursor as my primary Flutter IDE for the past several months, and this is everything I have learnt about making it work well — the setup, the workflows, the configuration tricks, and the honest limitations you should know about before switching.
Prerequisites
Before diving into Cursor configuration, make sure you have the following in place:
- Flutter SDK installed. Run
flutter --versionin your terminal to confirm. You should be on Flutter 3.x or later. If you do not have it yet, follow the official Flutter installation guide for your operating system. - Dart SDK. This is bundled with Flutter, so if Flutter is installed, you already have Dart. Verify with
dart --version. - Cursor installed. Download it from cursor.com. It is available for Windows, macOS, and Linux. Cursor has a free tier plus paid tiers such as Pro, Pro+, and Ultra; check the live pricing page because included usage, model access, and overage rules can change.
- A device or emulator for testing. Cursor itself does not provide simulators — you still need Android Studio for Android emulators or Xcode for iOS simulators. Cursor handles the code; your existing toolchain handles the device.
- Basic Flutter knowledge. This guide assumes you can build and run a Flutter app. If you are completely new to Flutter, start with the framework first and return here once you are comfortable with widget trees, state management, and the project structure.
Setting Up Cursor for Flutter
Cursor is a fork of VS Code, which means it supports the entire VS Code extension ecosystem. This is the single most important thing to understand: every Flutter and Dart extension you use in VS Code works identically in Cursor. You are not giving up any Flutter tooling by switching.
Installing Essential Extensions
Open the Extensions panel (Ctrl+Shift+X on Windows/Linux, Cmd+Shift+X on Mac) and install the following:
- Dart (by Dart Code) — provides Dart language support, syntax highlighting, code analysis, and formatting.
- Flutter (by Dart Code) — adds Flutter-specific commands, widget snippets, hot reload integration, and device management.
- Flutter Widget Snippets (optional but recommended) — provides shortcuts for common widget patterns like
stfulfor StatefulWidget andstlessfor StatelessWidget. - Pubspec Assist (optional) — helps manage dependencies in your
pubspec.yamlfile with search and auto-add functionality.
After installing the Dart and Flutter extensions, you may need to configure the SDK path. Open Cursor settings (Ctrl+, or Cmd+,), search for "flutter sdk", and set the path to your Flutter installation directory. On macOS this is typically something like /Users/yourname/flutter, on Windows C:\flutter or wherever you extracted the SDK.
Running Flutter Doctor
Open the integrated terminal in Cursor (Ctrl+` or Cmd+`) and run flutter doctor. This verifies that your environment is correctly configured. Address any issues it flags — missing Android SDK licences, Xcode command-line tools, or Chrome for web development. Cursor does not change any of these requirements; it is purely an editor replacement, not a toolchain replacement.
Verifying the Setup
Create a new Flutter project from the terminal: flutter create cursor_test_app. Open the project in Cursor, navigate to lib/main.dart, and verify that you get syntax highlighting, code analysis (red underlines for errors), and autocomplete suggestions from the Dart extension. Then press F5 or run flutter run from the terminal to confirm the app builds and launches on your connected device or emulator. If all of this works, your Flutter-in-Cursor setup is complete.
AI-Powered Flutter Workflows
This is where Cursor separates itself from VS Code. The AI capabilities are not bolted on through a third-party extension — they are woven into the editor at every level. Here is how each one applies specifically to Flutter development.
Tab Completion for Dart
Cursor's tab completion (called "Copilot++" internally) predicts what you are about to type and offers inline suggestions as you code. For Dart and Flutter, this works remarkably well in common scenarios:
- Widget boilerplate. Start typing
class MyWidget extendsand Cursor completes the entire StatelessWidget or StatefulWidget scaffold, including thebuildmethod, theKeyparameter, and thesuperconstructor call. - Property declarations. Type
finalinside a widget class and it suggests sensible property declarations based on the widget name and context. A widget calledUserProfileCardtriggers suggestions likefinal String userName;andfinal String avatarUrl;. - Method completions. Inside a
Stateclass, typing@overridetriggers completions for lifecycle methods —initState,dispose,didChangeDependencies— with the correct signatures andsupercalls. - Pattern recognition. If you have just written a
ListView.builderin one file, Cursor learns the pattern and offers similar completions when you start writing a list in another file within the same session.
The tab completions are fast — typically appearing within 200-400ms — and accurate enough that I accept them roughly 60-70% of the time in a typical Flutter coding session. That acceptance rate is lower than what I see in TypeScript (where it is closer to 80%), because Dart's widget tree nesting and named parameter syntax create more ambiguity for the model.
Widget Generation from Descriptions
Cursor's inline editing feature (Ctrl+K) lets you describe a widget in plain English and have the AI generate the Dart code. This is extraordinarily useful for Flutter because widget trees are verbose by nature. Examples of prompts I use regularly:
- "Create a card widget with a circular avatar on the left, a title and subtitle on the right, and a trailing icon button."
- "Build a bottom navigation bar with four items: Home, Search, Favourites, and Profile, each with appropriate Material icons."
- "Generate a form with email and password TextFormField widgets, input validation, and a submit button with loading state."
The generated code is usually 80-90% correct on the first attempt. Common issues include missing const constructors, incorrect EdgeInsets values for your design system, and occasionally using deprecated widgets. But as a starting point that you then refine, it saves significant time compared to writing the widget tree from scratch.
Composer for Multi-File Changes
Composer (Ctrl+Shift+I or Cmd+Shift+I) is Cursor's most powerful feature and the one that makes the biggest difference for Flutter development. Unlike inline editing which works on a single file, Composer understands your entire project structure and can create or modify multiple files simultaneously.
This matters for Flutter because a single feature typically spans several files: a model class, a repository or service, a provider or cubit, a screen widget, and possibly multiple child widgets. With Composer, you describe the feature once and Cursor generates all the files in the correct locations with consistent naming and proper imports.
Using Cursor Chat for Flutter
The chat panel (Ctrl+L or Cmd+L) is your always-available Flutter consultant. Here are the workflows I use it for most frequently:
Explaining Widget Trees
Select a complex widget tree — the kind with six or seven levels of nesting that you inherited from another developer or from a package example — and press Ctrl+L to send it to the chat. Ask: "Explain this widget tree layer by layer. What does each widget contribute to the layout?" Cursor's AI does an excellent job of walking through the hierarchy, explaining the role of each widget, and identifying which properties control the visual appearance versus the behaviour.
Debugging Build Errors
Flutter build errors can be cryptic, especially overflow errors, constraint violations, and generic type mismatches. Copy the error output from your terminal, paste it into the chat along with the relevant code, and ask: "What is causing this error and how do I fix it?" The AI correctly diagnoses most Flutter-specific errors — RenderFlex overflowed, Null check operator used on a null value, type 'Null' is not a subtype of type 'String' — and provides the specific code change needed.
Generating State Management Boilerplate
State management is one of the most boilerplate-heavy areas of Flutter development. Whether you use Riverpod, BLoC, or Provider, there is a predictable structure for every new feature. Here is where Cursor chat shines:
- Riverpod: "Generate a Riverpod AsyncNotifier and AsyncNotifierProvider for fetching a list of products from an API. Include loading, error, and data states." Cursor generates the notifier class, the provider declaration, and often a suggested consumer widget pattern.
- BLoC: "Create a BLoC for user authentication with events for login, logout, and check-auth-status, and states for authenticated, unauthenticated, and loading." It produces the event classes, state classes, and the bloc with
on<Event>handlers. - Provider: "Create a ChangeNotifier for a shopping cart with methods to add, remove, and clear items, and a computed getter for the total price." The output is clean and follows established Provider patterns.
The quality of state management code generation is noticeably better in Cursor than in a generic AI chatbot because Cursor has access to your project files. It picks up on your existing patterns — if you use freezed for state classes, it generates freezed-compatible code. If you use riverpod_generator, it uses the annotation-based syntax rather than the manual approach.
Composer Mode for Multi-File Flutter Features
This deserves its own section because it is the workflow that saves the most time. Here is a real example from a project I built recently.
I opened Composer and typed: "Create a complete product details feature. I need a Product model with fields for id, name, description, price, imageUrl, and category. A ProductRepository class that fetches a single product by ID from the /api/products endpoint. A ProductDetailsScreen that displays the product image at the top, followed by the name, price, description, and an Add to Cart button. Use Riverpod for state management. Put files in the appropriate feature-first directory structure under lib/features/product_details/."
Composer generated five files:
lib/features/product_details/data/product_model.dart— the model class withfromJsonandtoJsonmethods.lib/features/product_details/data/product_repository.dart— the repository with an HTTP GET call and error handling.lib/features/product_details/application/product_details_provider.dart— Riverpod providers for the repository and the product state.lib/features/product_details/presentation/product_details_screen.dart— the full screen widget with loading, error, and data states handled.lib/features/product_details/presentation/widgets/add_to_cart_button.dart— a separate widget for the button with a pressed state.
Was the generated code production-ready? No. The error handling was too generic, the UI needed visual polish, and the model needed equatable for proper equality comparison. But the structural foundation was correct, the imports were accurate, the Riverpod wiring was sound, and the feature-first directory organisation was exactly what I had asked for. Refining it took about 20 minutes. Building it from scratch would have taken over an hour.
.cursorrules for Flutter Projects
One of Cursor's most underrated features is the .cursorrules file. Place this file in the root of your Flutter project and it instructs the AI to follow your project-specific conventions every time it generates code. This is enormously valuable for Flutter because the framework has many valid approaches and you want consistency across your codebase.
Here is a .cursorrules file I use for my Flutter projects:
You are an expert Flutter and Dart developer.

Project conventions:
- Use Riverpod for all state management. Never use setState for anything beyond local UI state.
- Follow feature-first architecture: lib/features/{feature_name}/{data,application,presentation}/
- Always use const constructors where possible.
- Prefer named parameters for widget constructors.
- Use freezed for all data models and state classes.
- Use go_router for navigation. Never use Navigator.push directly.
- Write all text strings as localisable — use AppLocalizations, never hardcode strings.
- Prefer SliverList and SliverGrid over ListView and GridView for scrollable content.
- Always add key parameters to list item widgets.
- Use the logger package for logging. Never use print() or debugPrint().
- Follow effective Dart style: https://dart.dev/effective-dart/style
- Target Flutter 3.x and Dart 3.x. Use pattern matching and sealed classes where appropriate.
- All public API methods must have documentation comments.
With this file in place, every time Cursor generates code — whether through tab completion, inline editing, or Composer — it follows these rules. It uses Riverpod instead of Provider, creates files in the feature-first structure, adds const where appropriate, and avoids print() statements. The effect on code consistency is dramatic, especially when working in a team where multiple developers use Cursor.
Cursor vs VS Code + Copilot for Flutter
This is the comparison most Flutter developers considering Cursor want to see. I have used both setups extensively, and here is an honest breakdown:
| Feature | Cursor | VS Code + Copilot |
|---|---|---|
| Inline tab completion | Excellent — context-aware, multi-line | Excellent — slightly faster responses |
| Chat-based assistance | Built-in, project-aware | Copilot Chat extension required |
| Multi-file generation (Composer) | Yes — the killer feature | No equivalent |
| Project rules (.cursorrules) | Yes — enforces conventions | No native equivalent |
| Codebase indexing | Indexes entire project for context | Limited to open files and neighbours |
| Flutter/Dart extension support | Full VS Code compatibility | Native support |
| Hot reload / hot restart | Works via Flutter extension | Works via Flutter extension |
| DevTools integration | Same as VS Code | Native |
| Model selection | Choose between Claude, GPT-4o, etc. | Locked to Copilot's model |
| Cost | Free and paid tiers; check current pricing | Copilot at $19/month individual |
| Stability | Occasional minor bugs (VS Code fork lag) | Very stable (official VS Code) |
The differentiator is Composer. If your Flutter work involves building features end-to-end — model, repository, state management, UI — Composer's ability to generate and modify multiple files with full project awareness is something Copilot simply cannot match. For pure inline completions, the two are roughly equivalent, with Copilot having a slight edge in response speed.
Tips for Getting Better Flutter Code from Cursor
After months of daily use, here are the prompting strategies and habits that consistently produce better results:
- Be specific about your state management solution. "Create a login screen" gives generic results. "Create a login screen using Riverpod AsyncNotifier for state, go_router for navigation after success, and FormField widgets with validation" gives production-quality output.
- Reference existing files. Use the
@symbol in chat or Composer to reference specific files. "Create a new screen following the same pattern as @lib/features/home/presentation/home_screen.dart" tells Cursor exactly what style and structure to replicate. - Provide your model classes first. Before asking Cursor to generate a screen or repository, make sure the relevant model files exist in your project. Cursor reads them and generates code that uses the correct field names, types, and serialisation methods.
- Use iterative refinement. Do not try to generate a perfect feature in one prompt. Generate the basic structure first, review it, then follow up with "add error handling to the repository", "extract the list item into a separate widget", or "add pull-to-refresh to the screen".
- Keep your .cursorrules file updated. As your project conventions evolve, update the rules file. If you start using a new package (like
cached_network_imageinstead ofImage.network), add it to the rules so Cursor uses it automatically. - Review generated imports carefully. Cursor sometimes generates imports for packages that are not in your
pubspec.yaml. Always check that generated code compiles before moving on. Runningflutter analyzeafter accepting generated code is a good habit.
Limitations and Honest Caveats
Cursor is an impressive tool, but it is not perfect for Flutter development. Here are the real limitations I have encountered:
- Dart-specific syntax issues. The AI occasionally generates code with incorrect Dart 3 syntax — particularly around pattern matching, sealed classes, and records. It sometimes produces valid Dart 2 code that triggers deprecation warnings in Dart 3. Always run
flutter analyzeafter accepting generated code. - Widget tree accuracy. For complex nested layouts, the AI sometimes uses the wrong widget for the job — a
Columnwhere aSliverListis needed, or aStackwhere anOverlaywould be more appropriate. Deep layout knowledge still requires human judgement. - Platform-specific code. Cursor's AI is weaker on platform channel code (MethodChannel, EventChannel), native iOS/Android integrations, and platform-specific edge cases. For these, you are better off consulting the official Flutter documentation or platform-specific guides.
- Package version awareness. The AI's training data has a knowledge cutoff, which means it may generate code for older versions of popular packages like Riverpod, go_router, or drift. If a generated API call does not compile, check the package's migration guide for the current version.
- Cost. The free tier is limited, and serious Flutter development with Composer and chat throughout the day will usually push you toward a paid plan. Check Cursor's current Free, Pro, Pro+, and Ultra tiers before budgeting because included usage and model access can change.
- Editor stability. Because Cursor is a VS Code fork, it sometimes lags behind official VS Code releases by a few weeks. Occasionally, a Flutter extension update works in VS Code but has minor issues in Cursor until the next Cursor update. This is rare but it happens.
Frequently Asked Questions
Can I use Cursor for Flutter without paying for the Pro plan?
Yes, the free tier works. You get the full Flutter development experience — all VS Code extensions, hot reload, debugging, DevTools — because those features come from the Flutter extension, not from Cursor's AI. The free tier also includes limited AI usage. If you are a hobbyist or only use AI assistance occasionally, the free tier may be sufficient. For professional Flutter development where you rely on Composer and chat throughout the day, compare Cursor's current paid tiers before deciding.
Does hot reload work in Cursor the same way it does in VS Code?
Identically. Hot reload (Ctrl+Shift+F5 or the lightning bolt icon), hot restart, and the full debugging experience are provided by the Flutter and Dart extensions, which work the same way in Cursor as they do in VS Code. Device selection, emulator launching from the status bar, and Flutter DevTools integration all function exactly as expected.
Should I switch from Android Studio to Cursor for Flutter?
If AI-assisted coding is important to you, yes. Android Studio has Gemini integration, but it does not match Cursor's depth of AI integration — particularly Composer for multi-file generation and .cursorrules for project conventions. The trade-off is that Android Studio has tighter native Android tooling (layout inspector, APK analyser, native profiling). If you work primarily in Dart and Flutter rather than native Android code, Cursor is the stronger choice in 2026.
Related Tutorials
- How to Use Gemma 4 in VS Code: Setup, Extensions, and Coding Workflows — the free local AI coding alternative for VS Code
- Claude Code in VS Code: Extension Setup + Hybrid Workflow with Copilot (2026) — the terminal-based agentic alternative
- Flutter App Architecture in 2026: The Complete Guide
- Flutter State Management: Riverpod vs BLoC vs Provider
- Flutter Performance Optimisation: The 2026 Handbook
- How to Create Flutter Apps with AI: A Practical Guide